How to Create a Zoom in Effect in Premiere Pro
Have you ever filmed a stationary clip while you were on set and then, during the editing process, wished the clip had just a bit of movement to give the scene more of a cinematic edge? Perhaps the classic slow zoom in shot would’ve done the trick. But, alas, it’s too late to create some cinematic movement once you’re in post production … or is it?! In this article, I’ll break down how to easily create a zoom in effect in Premiere Pro so that you can make any stationary clip more cinematic.
The Process
The first thing you need to do is select your clip in the timeline, and then head to the effect controls panel.
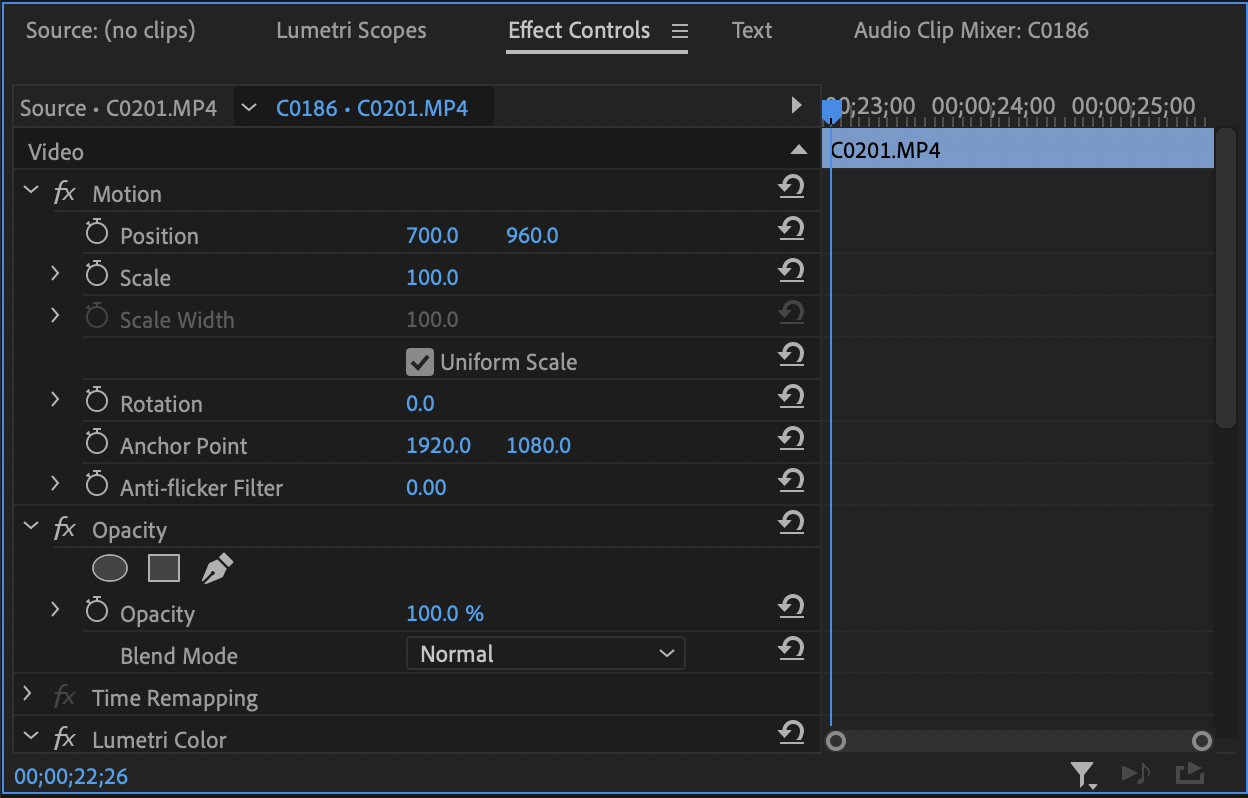
Once the effect controls panel is open, move the playhead towards the beginning of clip. Next, locate the “Scale” line, ensure that it’s set to 100%, and then click on the stopwatch looking symbol beside “Scale.” A point should now appear on the clip’s timeline in the effect controls panel. What this effectively means is that, at that point in the clip, it will be at a scale of 100%. If your point isn’t exactly at the beginning of the clip, drag it on the effect controls panel timeline to the very beginning of your clip. Now your clip will be at a scale of 100% right at the start of the clip.

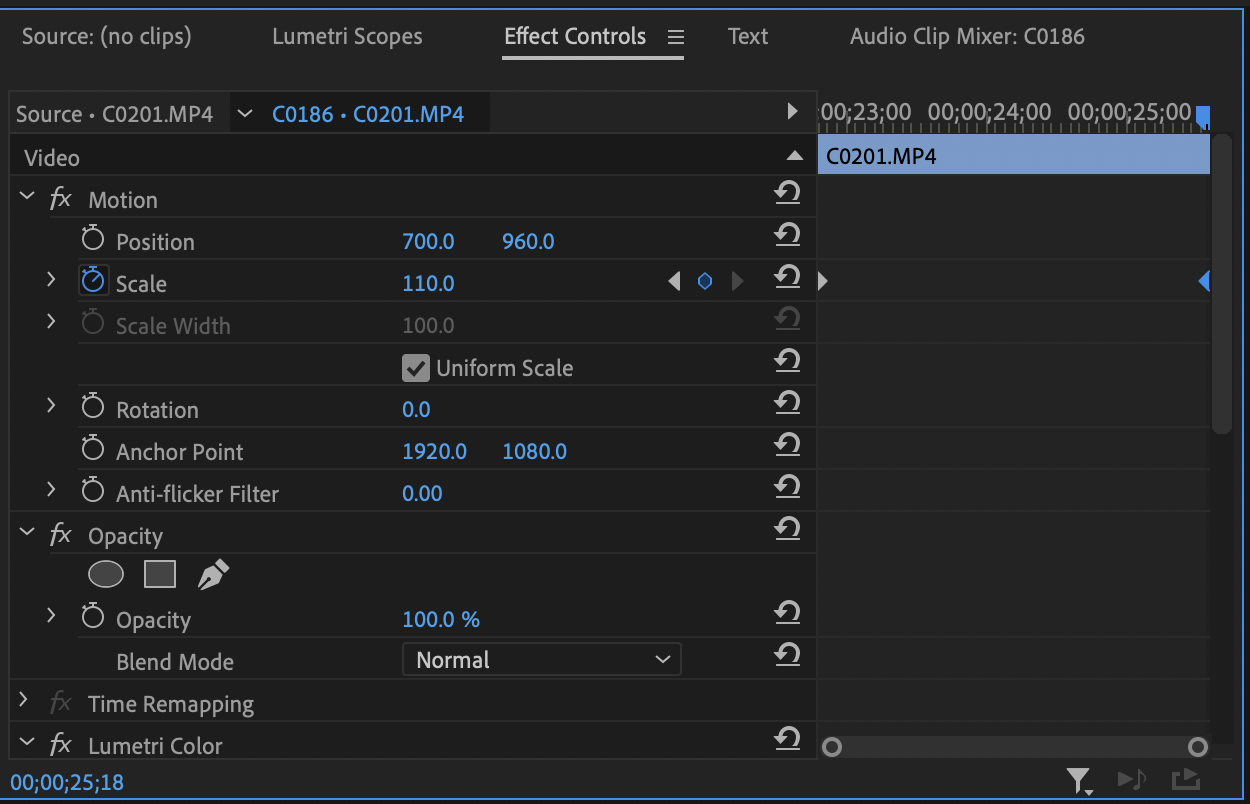
Still with me so far? All right, now for the magic. Drag the playhead in the effect controls panel towards the end of your clip. What you’re essentially going to want to do is increase the clip’s scale slightly at this point. So, locate the “Scale” line again, and then, instead of clicking on the stopwatch looking symbol again, simple click on the scale number (which should still say 100%), erase it, and plug in 105% or 110%. Once you hit enter, a new point will appear on the timeline. Again, drag the point to the very end of the clip if it wasn’t there already.
The Result
By placing a Scale point of 100% at the beginning of the clip and a Scale point of 105% or 110% at the end of the clip, Premiere Pro will automatically, smoothly and slowly zoom into your clip as it plays. The reason I recommend scaling to 105% or 110% is that you want the zoom effect to be relatively slow and believable. If you set the scale number at the end of the clip too high, Premiere Pro will need to zoom in a lot faster over the duration of the clip, which means the zoom itself may look too fast and unrealistic.
If you have a long clip, scaling to a higher percentage can work, as there is more runway essentially for the clip to go from 100% scale to whatever you input. I would, however, set a smaller scale first, no matter the length of the clip, and then adjust from there. Again, the goal here is to create a nice, smooth and cinematic zoom in effect in Premiere Pro.
I should also note that this same process works in reverse if you want to create a zoom out effect.
Conclusion
If you’ve ever wished some of your stationary, motionless video footage had a bit of cinematic movement, fear not. Premiere Pro comes equipped with the tools to add realistic, cinematic movements easily, and the classic zoom in effect is one of the most effective. All you need to do is set a scale point of 100% at the beginning of your clip, and then set a second scale point a little bit higher at the end of your clip. That’s it. Then sit back and watch Premiere Pro create a super smooth zoom in effect right before your eyes.